Development with Nitro and WSL2
Nitro requires WSL2 for Windows, which runs the Linux distribution of your choice inside your normal Windows operating system. Nitro uses Docker in this environment to manage containers, which comes with limitations and performance considerations.
#Mind Your Terminal
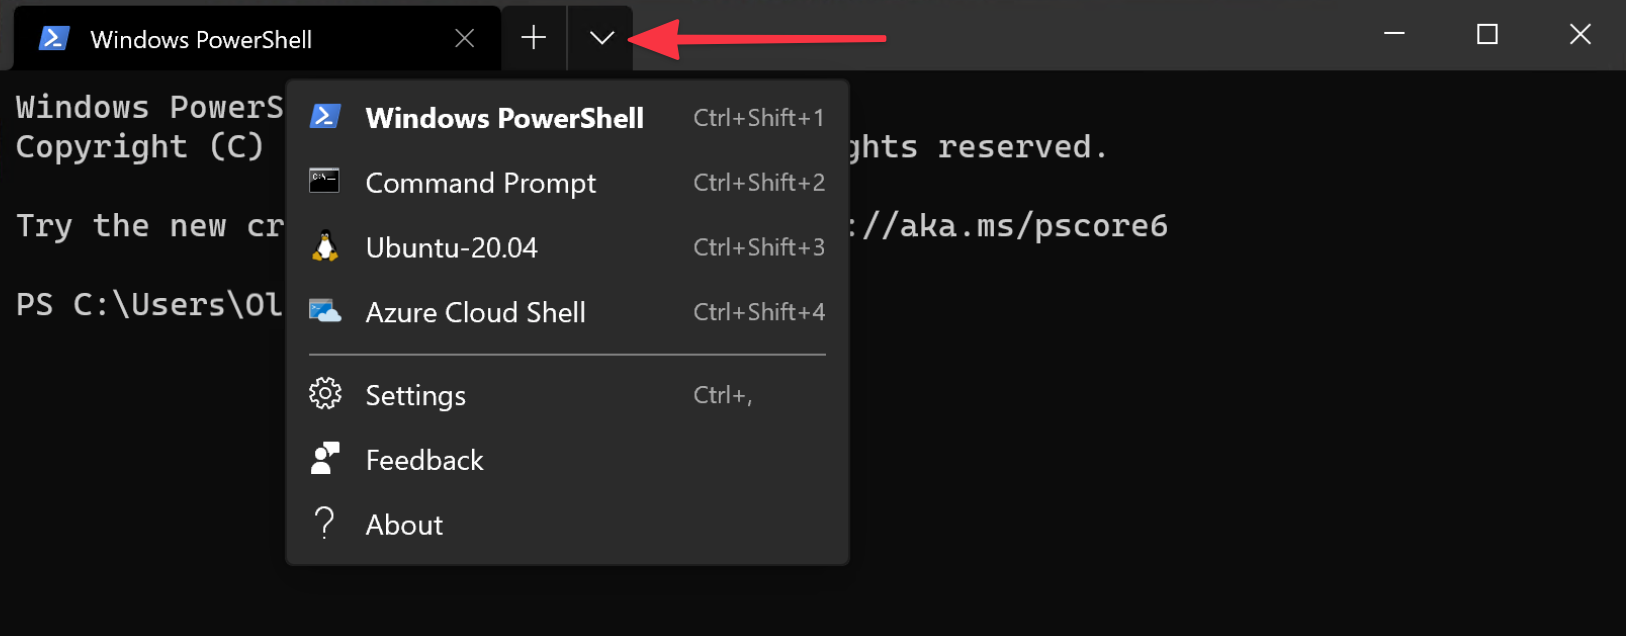
We recommend using Windows Terminal (opens new window), Microsoft’s new(ish), free app that provides easy access to the various Windows shells.
Windows Terminal opens PowerShell by default, which you’ll need for first installing WSL2, and the Ubuntu shell you’ll want for installing and using Nitro. You’d otherwise need to run “PowerShell” or “Ubuntu” separately from the Start menu.

#Filesystem Performance is Best Inside WSL2
Running WSL2 means you have two filesystems: the Windows one you’re used to, where your home directory looks like C:\Users\Oli, and the Linux one where the home directory is something like /home/oli.
Each filesystem has a reference to the other: a \\wsl$ share is available to Windows and a /mnt folder exists in the Linux filesystem. (So from the Ubuntu terminal, your Windows C:\Users\Oli folder is available at/mnt/c/Users/Oli.)
Using the Linux mount incurs a performance penalty, so it’s best to keep your project files in the Linux volume only. Your Ubuntu home folder is an ideal place for projects, i.e. /home/oli/dev which is equivalent to ~/dev. As long as the full path to your project folder does not start with /mnt, you’ll get optimal performance from Nitro and Docker.
This also means working with your files from Windows is less convenient, but you can access the Linux filesystem from Windows by accessing the \\wsl$ share.
Enter \\wsl$ in the File Explorer’s address bar and press Enter. You should see an “Ubuntu-20.04” share volume available to browse.
If you use PhpStorm, you can load your project via \\wsl$\Ubuntu-20.04\home\oli\dev\mysite.nitro. Performance isn’t as fast as the native filesystem, but faster than going through /mnt.
Visual Studio Code (opens new window) offers the best performance via the Remote - WSL (opens new window) plugin, which will mount the Linux filesystem on Windows inside of Visual Studio Code.
#Set Permissions When Adding a New Site
When adding a new site, you’ll need to manually set permissions from the root of the Craft project from within the WSL2 distro:
chmod 777 ./.env
chmod 777 ./composer.lock
chmod 777 ./composer.json
sudo chmod -R 777 ./config
sudo chmod -R 777 ./storage
sudo chmod -R 777 ./vendor
sudo chmod -R 777 ./web
You’ll probably need those sudo commands to properly set permissions on directories. You can try first without them, but a chmod(): Operation not permitted warning from Craft means you’ll need those elevated permissions.
#Manually Trust Certificates and Edit the Hosts File
The first time you add a Craft site, you’ll need to manually run a command on the Windows host machine to import a certificate file so SSL will work. You can follow the terminal output for exact instructions.
Nitro cannot edit the Windows hosts file at C:\Windows\system32\drivers\etc\hosts and will provide you with copy+paste instructions when it needs the file updated. It’ll look something like this:
For your hostnames to work, add the following to `C:\Windows\System32\Drivers\etc\hosts`:
---- COPY BELOW ----
# <nitro>
127.0.0.1 mysql-8.0-3306.database.nitro mysite.nitro myothersite.nitro
# </nitro>
---- COPY ABOVE ----
Nitro attempts to update hostnames when you run nitro apply—so you may need to run that after adding your first site.
Windows only allows for up to nine aliases per line in the hosts file. If you have more than nine, you will need to add any aliases after the ninth one onto a new line below starting with 127.0.0.1.
#Note WSL2 Memory Usage
WSL2 has been known to consume a lot of memory, most noticeably on machines with more limited RAM.
If you find WSL2 consuming more of your system memory than you’d like, you can manually specify limits by adding a .wslconfig to your user directory.
If we wanted to limit WSL2 to 6GB memory, for example, we would create a C:\Users\Oli\.wslconfig file with the following contents:
[wsl2]
memory=6GB
swap=0
Then run wsl --shutdown and restart Docker to apply the change. This will put a hard limit on RAM usage and prevent any swap file from being created.
On the other hand, if your database containers are unexpectedly stopping or the vmmem.exe process heavily consumes disk usage for several minutes, you probably don’t have enough memory or swap file allocated to WSL2.